Setup
Follow along on Youtube!
Table of Contents
Preparation
There is minimal preparation needed to utilize TezPay, assuming that you have a functioning public baker running.
Preparation Summary
- Create a directory (folder) on your desktop (or appropriate location) to store the application files and required config files
- Download the Tezpay software, sample configuration, and payout wallet files from github
- Create a ‘pay-out’ wallet and store the private key (not baker or hot wallet)
Preparation: Step 1 Create TezPay Directory
Create a new folder on the desktop or in a location that you want to store the necessary files for Tezpay.
 |
|---|
This folder will eventually contain 3 files:
- TezPay Application File
- Configuration File
- Private-Key File
The TezPay Application File will execute the commands that will run TezPay, the Configuration File will essentially tell the application file how to run and will be edited by the baker (we will cover this later), and the Private-Key File will contain the private key for a wallet you have designated to pay your delegators (we will explain an easy way to get this later as well).
⚠️ WARNING: Private Key File
Do NOT use an existing wallet that contains important assets (NFTs, tokens, etc.). Create a new dedicated wallet that contains only enough Tezos to pay out delegates.
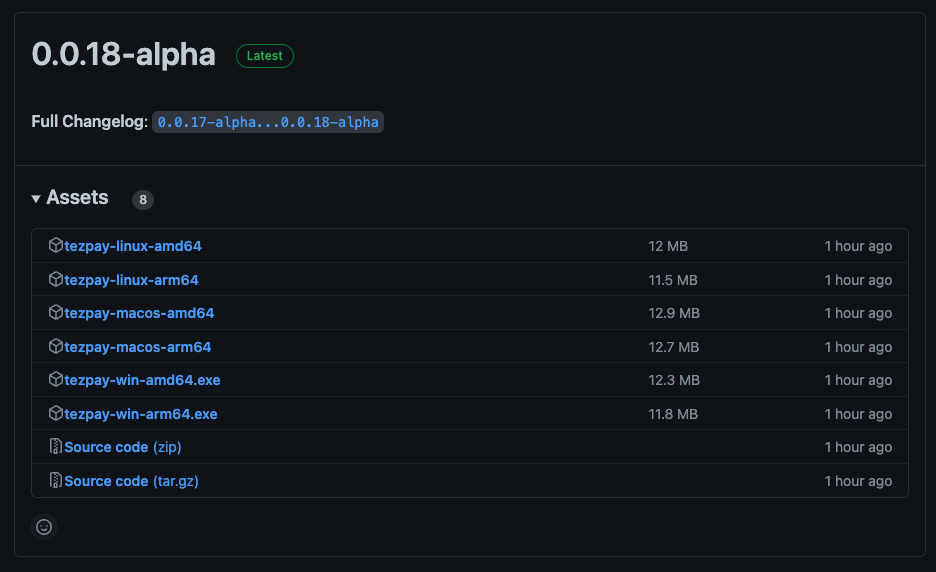
Preparation: Step 2 Download Files
Download the software from Github using the link: https://github.com/tez-capital/tezpay/releases. In this repository, select the correct operating system and system architecture (arm64 or amd64). For this example we will be using arm64
 |
|---|
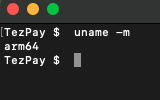
Note: If you do not know the system architecture you can find out by
opening a Terminal and executing the command uname -m, and this will
return the system architecturearm64 or amd64.
The example below displays arm64
 |
|---|
If you would rather utilize CLI to download the application you will need
to change directory (cd) to the TezPay directory created in step 1 in
the terminal, then use command wget -q https://pay.tez.capital/install -O /tmp/install.sh && sh /tmp/install.sh
See example code below (note: input begins after last ‘%’ character):
 |
|---|
The above example is an alternative to downloading from the GitHub repository
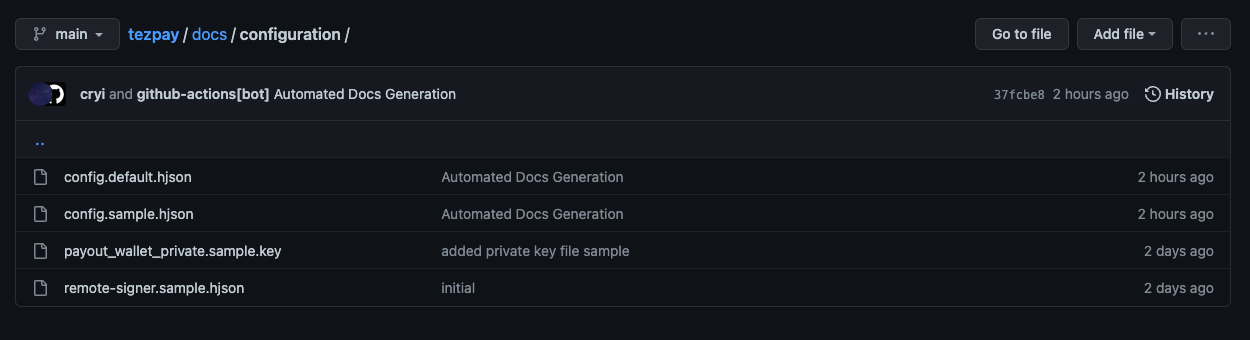
Next, you will download the sample configuration file & payout_wallet_private.sample.key file from : https://github.com/tez-capital/tezpay/blob/main/docs/configuration/ - or you can open file in GitHub and copy text to a text editor.
Note, there are two choices for the configuration files:
- Simple Config file : config.default.hjson (basic arguments to run Tezpay)
- Full Config: config.sample.hjson (advanced arguments to run Tezpay)
 |
|---|
Preparation: Step 3 - Payout Wallet (optional)
Lastly, you will need to download the create a new wallet and retrieve the private key. We will be using the Temple Wallet extension to create a new wallet and to get the private key. If you already have a payout wallet, or know how, skip this section.
- First, open Temple Wallet and select the icon in upper right
 |
|---|
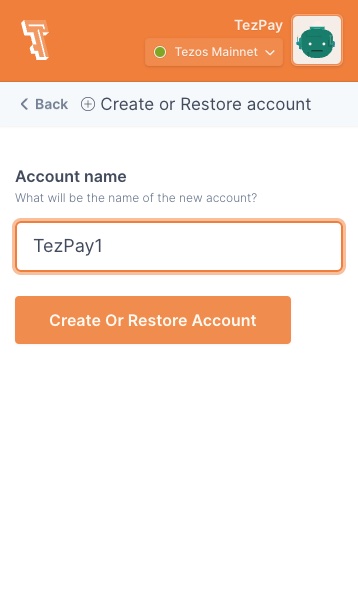
- Next, select ’new account’, and input a new (ie Tezpay1)
 |
|---|
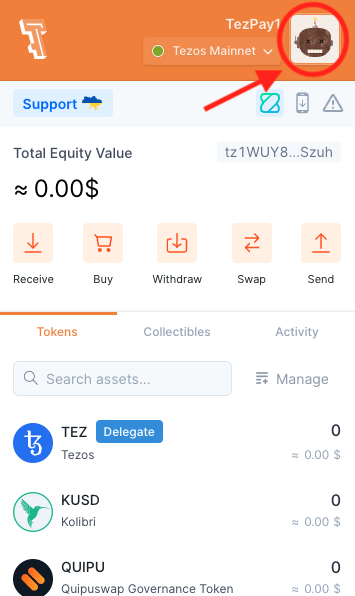
- Then, click the icon in the upper right again
 |
|---|
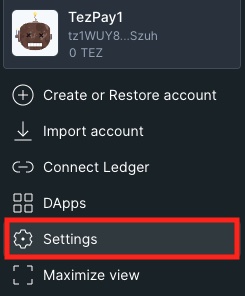
- Then, go to Settings
 |
|---|
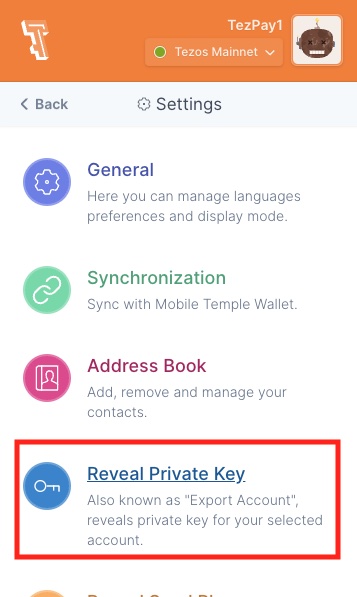
- Then, go to Reveal Private Key
 |
|---|
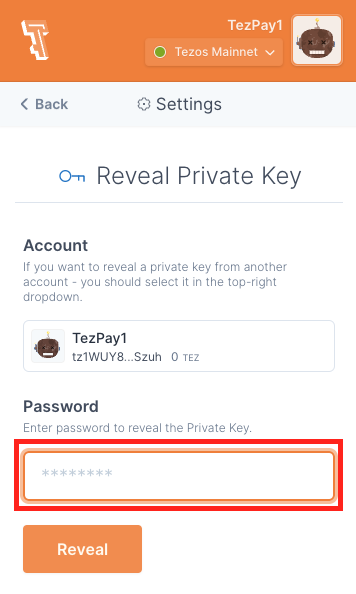
- Then, you will be prompt to input your password for the account
 |
|---|
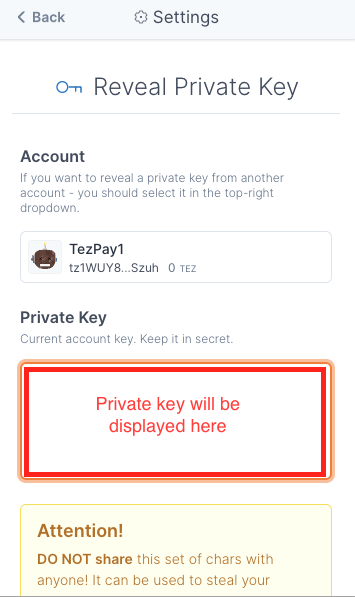
Your private key will be displayed here:
 |
|---|
Setup
The next section will review the setup needed for Tezpay. We will review the Configuration File and Payout Wallet files. In this section we will review:
- Configuration File (simple)
- Configuration File (advanced)
- Private-Key File
Setup: Step 1a: Configuration File (simple)
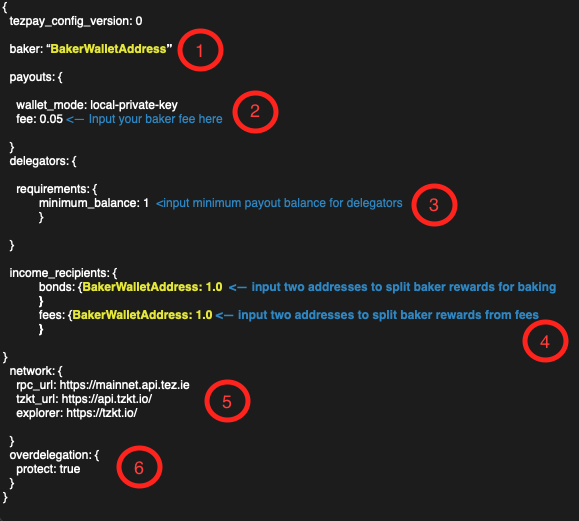
This section will review how to setup the configuration file (simple-version) to be used by the TezPay application.
Note: must have file name config.hjson, case-sensitive
 |
|---|
ℹ️ INFO: If you’re familiar with JSON but new to HJSON (Human JSON), you can learn more at https://hjson.github.io/. HJSON is more forgiving than JSON and supports comments.
Yellow is areas you will input data/edit fields
Blue are comments about Configuration File objects
- Paste your Baker wallet in between the quotes
- Set your Baker fee (ie 0.05 = 5% fee)
- Input minimum payout for delegators (ie. 1 = 1 XTZ)
- This section allows you to split payments for baking (Bonds) and fees from delegators (Fees) if you want - input Baker wallet address and percentage to split. This example does not split, where 1=100% to baker wallet.
- This section refers to network parameters to fetch information about the baker in order to compile rewards and payouts - Do not edit unless you are an experienced user
- Over delegation projection prohibits you from over paying beyond your delegation limit - Do not edit unless you are an experience user
This is as basic configuration file for running the TezPay application. The next section will review the advanced configuration file, giving more options and customization to the TezPay application. A user may splice sections from the advanced file to the simple to build a custom file as well - but should be done by experienced users.
Setup: Step 1b: Configuration File (advanced)
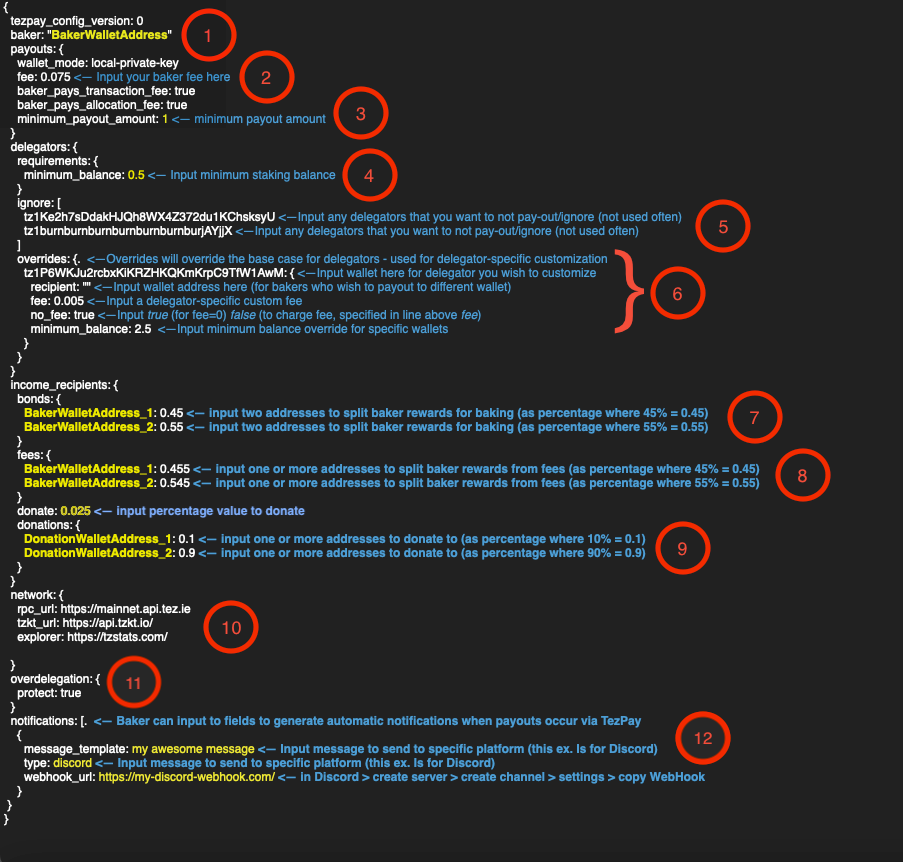
This section will review how to setup the configuration file (advanced-version) to be used by the TezPay application.
Note: must have file name config.hjson, case-sensitive
 |
|---|
Yellow is areas you will input data/edit fields Blue are comments about Configuration File objects
💡 TIP: Start Simple
The example below is a more advanced configuration file showcasing several customization features. For most bakers, a simpler configuration is recommended. See TezPay Starter Configuration which works for 90% of bakers.
- Paste your Baker wallet in between the quotes
- Set your Baker fee (ie 5% = 0.05)
- Input minimum payout for delegators (ie. 1 = 1 XTZ)
- Input minimum staking balance for delegators
- Input delegators wallets that you wish to ignore completely (not often used)
- Overrides: These will override global settings for delegators - you
may delete/remove specific fields where you want to ignore
- Input wallet address for specific delegator you wish to apply overrides for
- Input a delegator-specific custom fee (ie 0.5% = 0.005)
- Input either true or false where true removes the fee from delegator, and false applies the fee specified in the line above
- Input minimum balance override for specified wallet\
- If you wish to add multiple wallets for over rides, add another
wallet following same format keeping the
{ }to contain the wallet attribute as shown.
- This section allows you to split payments for baking (Bonds), input wallet address and percentage to allocate (see example above for structure of more than 1 wallet. 100%=1.00
- This section allows you to split payments for fees collected (Fees), input wallet address and percentage to allocate (see example above for structure of more than 1 wallet. 100%=1.00
- Donations refer to donating a specific amount of XTZ to wallets
every payout
- Input a donation amount in donate field as a percentage (ie 2.5% = 0.025)
- Input wallets that you wish to donate to and percentage for each (ie 100% = 1.0)
- This section refers to network parameters to fetch information about the baker in order to compile rewards and payouts Do not edit unless you are an experienced user
💡 TIP: Configure Multiple RPCs for Reliability
To avoid RPC failures during payouts, configure multiple RPC endpoints in your
config.hjson:network: { rpc_pool: [ "https://rpc.tzkt.io/mainnet" "https://rpc.tzbeta.net/" "https://eu.rpc.tez.capital" "https://us.rpc.tez.capital" "https://prod.tcinfra.net/rpc/mainnet" ] tzkt_url: "https://api.tzkt.io" }TezPay will automatically try the next RPC if one fails.
- Over delegation projection prohibits you from over paying beyond your delegation limit Do not edit unless you are an experience user
- This section allows for automatic notifications/messages to be sent to specific platforms in order to broadcast messages (ie ‘Bakery has paid 100XTZ in rewards for latest cycle’ We will cover this in a separate section see appendix X and platforms supported are Twitter, Discord, and E-mail
Advanced Configuration Examples
The following examples show common configuration patterns you can add to your config.hjson.
Custom Fees for Specific Delegators
You can set custom fee rates for individual delegators using two methods:
Method A: Full Override
Use delegators.overrides for complete control over a delegator’s settings:
delegators: {
  overrides: {
    tz1YourFriendAddress: {
      fee: 0         // 0% fee - friend pays no fee
    }
    tz1SpecialDelegator: {
      fee: 0.02      // 2% custom fee (lower than your default)
    }
  }
}
Method B: Fee Shortcut
Use delegators.fee_overrides for a simpler syntax when you only need to change fees:
delegators: {
  fee_overrides: {
    0: ["tz1FriendAddress1", "tz1FriendAddress2"]     // 0% fee (no fee)
    0.02: ["tz1LoyalDelegator"]                       // 2% fee
    0.5: ["tz1Address1"]                              // 50% fee
    1: ["tz1CharityAddress"]                          // 100% fee (all to baker)
  }
}
💡 TIP: Use Method B (
fee_overrides) when you only need to change fees. Use Method A (overrides) when you also need to change other settings likeminimum_balanceormaximum_balancefor a delegator.
Payment Timing After Cycle Completion
Control when TezPay sends payments after a cycle ends using the payouts section:
payouts: {
  minimum_delay_blocks: 10     // Wait at least 10 blocks after cycle ends
  maximum_delay_blocks: 250    // Pay within 250 blocks maximum
}
Why this matters:
- TezPay picks a random time between the minimum and maximum delay
- This spreads out payout transactions across the network
- Prevents congestion if many bakers pay simultaneously at cycle end
Timing reference (at 6 seconds per block):
| Blocks | Approximate Time |
|---|---|
| 10 | 1 minute |
| 50 | 5 minutes |
| 250 | 25 minutes |
The default values work well for most bakers. Adjust only if you have specific timing requirements.
Other Configuration Options
TezPay has many more options available. Here’s a quick reference to help you know what’s possible:
Payout Mode (payouts.payout_mode):
payouts: {
  payout_mode: ideal    // 'ideal' (default) or 'actual'
}
ideal— Pay based on what delegators should have earned (rarely used but availablea)actual— Pay based on what the baker actually earned (accounts for missed blocks/attestations)
Who Pays Transaction Fees (payouts):
payouts: {
  baker_pays_transaction_fee: true      // Baker covers tx fees (default: true)
  baker_pays_allocation_fee: true       // Baker covers allocation fees for new accounts
}
Delegator Filtering (delegators):
delegators: {
  // Only pay these specific addresses (leave empty to pay everyone)
  prefilter: [
    "tz1WhitelistedAddress1"
    "tz1WhitelistedAddress2"
  ]

  // Never pay these addresses (rewards redistributed to others)
  ignore: [
    "tz1BlacklistedAddress"
    "tz1burnburnburnburnburnburnburjAYjjX"
  ]
}
Redirect Payouts to Different Address:
delegators: {
  overrides: {
    tz1OriginalDelegator: {
      recipient: "tz1DifferentPayoutAddress"    // Send their rewards here instead
    }
  }
}
Cap Delegator Balance (Overdelegation Management):
delegators: {
  overrides: {
    tz1LargeDelegator: {
      maximum_balance: 100000    // Only count up to 100k tez of their balance
    }
  }
}
Minimum Balance & Small Reward Handling:
delegators: {
  requirements: {
    minimum_balance: 1                           // Delegators need at least 1 tez
    below_minimum_reward_destination: everyone   // 'everyone' or 'none'
  }
}
everyone— Redistribute small rewards to other delegatorsnone— Small rewards go to the baker
Overdelegation Protection:
overdelegation: {
  protect: true    // Prevent paying more than you can cover (recommended)
}
📚 Full Reference: See the complete sample configuration for all available options including notifications, extensions, and network settings.
Setup: Step 2: Private-Key File
The Private Key file is used to sign the transaction(s) that will payout the rewards. From a security perspective, it is recommended NOT to use the Baker private key due to security concerns with the private key being displayed in plain-text in a file. This section will use the new account and private-key that was acquired in Step 3 - Payout Wallet.
- Retrieve the private-key of the wallet you wish to use from the payout wallet of your choice
- Paste into a text file (or replace the example that was downloaded from the GitHub repository
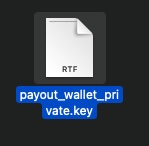
- Save the file with exact file name and extension payout_wallet_private.key - note: the .key is required in this instance (see below)
 |
|---|
Setup: Summary
At this point there should be 3 files in the directory tezpay. These three files will be used to run the application and payouts.
What’s Next
✅ TezPay is configured! Next steps:
- Generate a test payout — Verify everything works before going live
- Integrate with TezBake — Automate payout scheduling as a managed service
- Set up notifications — Get payout confirmations via Discord, Twitter, or email
Related Guides
Next Steps:
- Paying Delegators - Run your first payout
- TezBake Integration - Automate payouts with TezBake
- TezPeak Setup - Manage payouts with a graphical web dashboard
- Notifications - Set up Discord/Twitter/email alerts
Configuration:
- Configuration Examples - Sample configs for common scenarios
- Extensions - Customize TezPay behavior
Getting Started with Baking:
- Baking on Mainnet - Set up your baker first
Any questions/comments/concerns? Please contact the Tez Capital team on Discord or Telegram